Showing posts with label before and after. Show all posts

Thursday, September 20, 2012

Jewelry Cabinet

 finishedcollage3

I am so excited to be the new DIY Contributor at Rags to Stitches!

Today I am sharing my first project.  I’d love it if you would come say hi and check out all the details of this fun transformation...

PicMonkey Collagebeforeafter5


linking up…

The Shabby Nest504 Main

Wednesday, February 29, 2012

Gray Washed {faux} Wood

IMG_0656
If you follow me on Twitter or Instagram, you may have seen this treasure I picked up for $2 the other day.  I am not quite sure what it’s previous life was…maybe sewing box?  It reminds me a little bit of {this guy} and I am seriously loving how beautiful it turned…oh, and it was so simple!
Here is the glorious before…
photo (10)

All I did was give it a good cleaning, of course, and then simply dry brushed a Martha Stewart paint sample I had (Bedford Gray).  I wanted to give it a worn gray washed wood like appearance, so the brown base was perfect.  I used a basic bristle brush.  I dipped just the end in a little paint, dabbed in on a paper towel then lightly and quickly brushed the surface.  It literally took me under 5 minutes.
IMG_0642
I love how it picked up the amazing detail in the medallion and how the beautiful lines and curves are shown off.  It is a plastic material, but now has the appearance of carved wood. 
  IMG_0646    IMG_0645
I am not sure what her new life will be…maybe house some hair stuff…maybe makeup?…storage for my Rustik Chic supplies in my craft space?
I am sure however, I love price (2 bucks people!) and end result.


Linking up!
shabby creek cottageThe 36th AVENUEShare Your CreationsHOG


Monday, June 6, 2011

Quick Change Mirror


IMG_1985
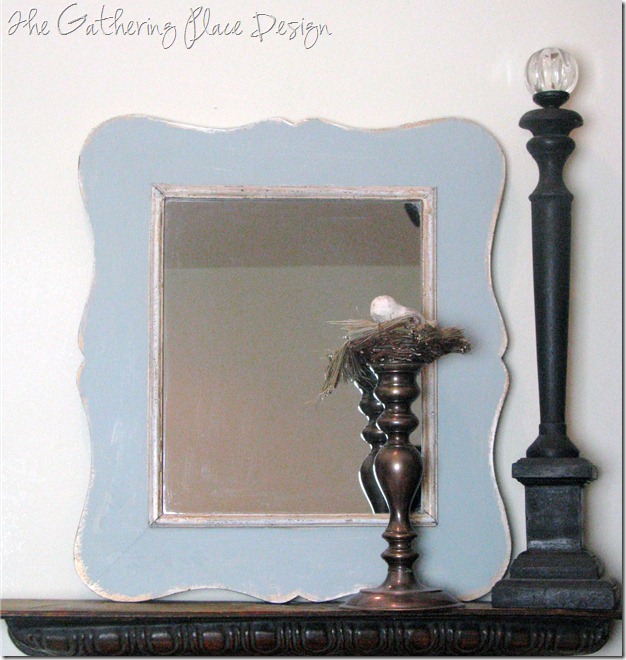
I’ve had this little mirror for years, but as of late she’s just been chillin’ in storage.
I love the shape of it and the details on the edges, but I was over the flowers and wanted some color added to our family room.  I very casually painted the frame leaving the edges alone for a layered & aged look.
~I  used a little sample bottle of Glidden paint called Slate Green. I love using these samples for small projects like this.  Since I wanted a ‘not-so-perfect’ look for this mirror I evened used the little brush included to paint. ~
  IMG_1771     IMG_1981
Literally took me under 5 minutes…what do you think?

Tuesday, May 31, 2011

Adding Some Character

IMG_1797
Have you ever dissected a piece of furniture or home decor that you love to see what it is exactly that you love about it?
For me it is usually in the little unique details.
IMG_1832
  Enter these woven baskets with lids. 
I bought these on super clearance for like $15 for all three. They are fine as is….  Nice basic baskets, but nothing to write home about. 
IMG_1827
But by simply adding a little detail, they suddenly look interesting and unique.  I just tied on some old  metal pieces I already had with twine and a few minutes later…some instant character to my boring baskets.
IMG_1830  IMG_1828IMG_1831
I really love them now.
Look around and notice what you like and why.  Then see how you can turn what you already have into something you love!

Photobucket 

Monday, April 25, 2011

Lovely Little Desk

IMG_1455 IMG_1451 IMG_1458
I have mentioned before that I am {slowly} working on turning our guest room into a playroom.  I’ve completed a few projects here and there so hopefully soon it will all come together.  One more project down…
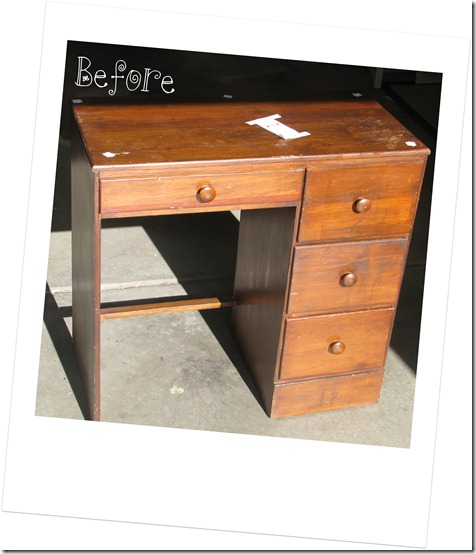
I found this little desk for $5 at a thrift store and I thought with a little love it would be a perfect little homework or art station.  Beautiful, right? ;)
IMG_0340-1
A little sanding, painting, wood appliqué-ing distressing, and cute {clearance} knob-afying later…  
IMG_1448-1 
Isn’t she sweet?
Almost makes me want to pull a little chair up and write a poem or short story.
 IMG_1449
I applied the little wood appliqué on the bottom because it was just screaming for one, plus I wanted to feminize it a bit.
*TIP-Adding appliqués like this is a great, inexpensive way to add character and customize your thrift store pieces.  Also, I stained the appliqué first to match the wood on the desk so when it was painted and sanded it would look the same color as the rest of the desk.
IMG_1456
I used a few coats of flat white spray paint to cover.  Then I sanded the edges and added some glaze to give it more antiquing.  The precious little knobs were a steal at TJ Maxx.  (Like $3 for all of them.) LOVE.
*TIP- Unique knobs make a huge difference…check out the before with the basic wood knobs.  By simply adding some color and detail with knobs, this piece takes on instant charm with a whole new look. 
 IMG_1453IMG_1452
 
Stayed tuned for the completion of the playroom transformation…
but please don’t hold your breath;) 
*If you have any tips on how to stayed extremely focused on one room at a time…please send them my way. ;)
Linking up to… 

Centsational Girl’s All Things Paint Party
Primitive and Proper Piece of Work Wednesday
Domestically Speaking
Make it Yours @ My Backyard Eden  


HOGFurniture Feature FridaysPhotobucket 

Have you entered my Spring Wreath Giveaway yet?!
IMG_1247

Thursday, November 18, 2010

Easy Winter Centerpiece Update

IMG_0099

I’ve been doing a little preparation for my Christmas decor and one thing I love to do is reuse or repurpose decorations that I have either bought on super clearance or ones that I have simply fallen 0ut of love with. 

IMG_0076

So enter this little tree trio I bought on super clearance for like 5 bucks.  I like the shape, it was sturdy and I liked the look of the realistic look of the pines.

IMG_0080 IMG_0082

So, I used my paint sample to to cover most of the base.  I wasn’t feeling the green and black spongy look.  I wanted it to have a sort of rough aged appearance so I just slopped it on, dry brushing even some areas.

Next I taped of my new color and spray painted the legs with my Oil Rubbed Bronze.  It was not optimal spray painting weather, but a girls gotta do what a girls gotta do.  Right?

IMG_0100

 For another element and texture, I glued just twine around the top and added in pinecones I collected out of my Mom’s yard.  And street. My kids think I am nuts because I had gathered some in the yard, but as we left I saw a bunch in the road and of course I pulled over and rescued them.  It was very windy. And raining.  The kids were screaming, “Mom, get out of the street!” It was very dramatic! ;) The danger I put myself in sometimes for free beautiful decor. Sigh.

IMG_0098

And there you have it! 

IMG_0104

Oh and I want to take a minute to share the importance of fluffing your faux pine.  Whether it is your wreaths, trees…whatever, it is important to pull out and arrange the stems of the pine.  Makes a HUGE difference. 

IMG_0076 IMG_0101

Now, let’s see a side by side just to show what a big difference you can make with a small amount of time and little or no $.  Pretty cool, huh?

So get out your decor and see what needs a little sprucing up.  You might be surprised what you can do with a few little changes.

Linking up…

Visit thecsiproject.com

Join  us Saturdays at tatertotsandjello.com for the weekend      wrap    up           party!FrugaliciouFridaybutton-1 UndertheTableandDreaming