Saturday, June 25, 2011
Painted End Table
Monday, May 9, 2011
Quick Fix {Furry, Fuzzy Ottoman}
Do you have small little projects waiting for you, but you keep putting them off? I don’t know why I do this, but I let a 5 min something loom over my head for 5 weeks! Dumb. ANYWAY…
Our poor little ottoman has seen better days. I bought it a few years back and it has served us well housing many different items as well as propping up tired feet.
During last few weeks it took a turn for the worse. The fabric suddenly popped open and was in desperate need of some recovering. I have been completely putting it off deciding what fabric to use, but in the meantime it was a huge eyesore in our family room. I was thinking of doing something more interesting like The Nester’s fur ottoman, but never got around to finding some fur like hers.
Well, last week I was in my Grandma’s sewing room {which is more like a mini fabric store} and I saw this faux fur. She gladly offered it to me to try out...{because she is wonderfully awesome like that!}
Literally less than 5 minutes later.
It was so simple but makes such a difference. It’s a bit shorter than The Nester’s, but I quite like it’s new fuzzy coat and it is super soft!
I have a few more of these simple little tasks that I know will make a big difference. If you are in the same boat, lets knock out some of these smaller projects that help our homes feel more put together, ultimately removing some clutter from our brains…are ya with me?! ;)
Please excuse my excessive enthusiasm over such a small project, but I’ve been such a slack job lately, it feels GREAT!
Linkin up…
Monday, April 25, 2011
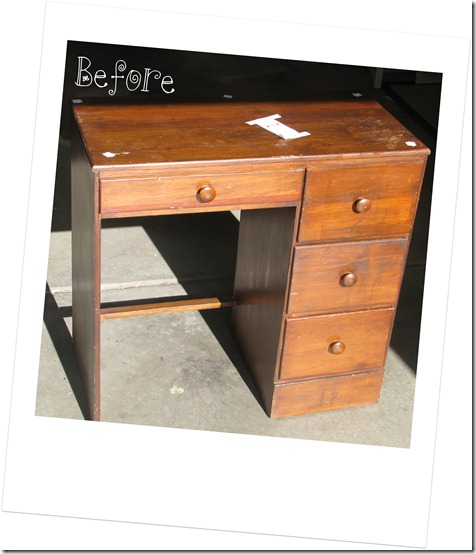
Lovely Little Desk


Wednesday, July 21, 2010
NapaStyle {Inspired} Makeover
I love the rustic look of them and the idea of using unconventional items for tables, like the grape crate side table above. I know it is just a replica, but until I can find the perfect antique crate, with the original stamp on the side…in all it’s rustic charm…for a STEAL… my version will have to do. ;) I would really love to do something like the wine storage trunk on the right, but for now it is in my maybeonedayIcoulddothis vault. Moving on…
Here is the before. My Grandma bought this for me right before I got married so he’s been around for the last 11 years or so. {I’m feeling old} He has been abused a bit so I knew I either had to stain or paint the ol’ guy. Here are the after shots.
I used a gel stain called hickory and then traced an outline with a stencil of the words I wanted on the back. I then filled them in with a paint brush. I love the lettering on the back!! The new look of this trunk adds a lot of character and warmth to our family room. It wasn’t a super timely or difficult project, but I think it makes an impact. I am defiantly pleased with the turn out. Plus the fact that I have wanted to do this for MONTHS and it is now completed is the best part. I am hoping I have inspired you to gather inspiration! Warmest Wishes!
***Just wanted to share a custom order arrangement I recently created. I borrowed it for ‘staging’ purposes and now it’s off to it’s owner. ;)
Linking up with these fine folks…
Thursday, March 18, 2010
Unique No Sew Chair Cover
I have been working on some items for my Esty store and some other fun spring projects that I will be sharing with your soon. Including my $5 challenge for Living With Lindsay, which turned out way cute. I'm excited!
But, today I am going to share with you a super easy no sew chair cover that I did a couple years ago. Alright, I have this thing with old chairs. I love them. Not sure why, but they always call to me. Anytime I see one in a family members garage, I always offer to take it off their hands. $2 garage sale chair?... It's mine! Then, Mr. Husband asks "why do you love junk?".
This particular fella I believe I stole out of my Mom's garage. She is so good to me! ;) It was not necessarily cute nor did it have any extremely interesting detail. I just liked it. Oh, it even had a grodey (does anyone say that besides my mom? it means gross. lol) vinyl-ish pleather seat. Mr. Husband LOVED this one!! ha
It sat around for a bit, until one day I saw a cute little seat redo in a BHG mag. and I thought, 'I can do that...sort of.' ;)
All I did was measure my clearance (love) fabric to the length that I wanted it to hang over the sides and the front. Pretty much a rectangle. Then I got out my handy liquid stitch and "hemmed" the edges all around.
Next I laid it evenly and centered across the chair and stapled it to the wood seat frame along the back of the seat. This fabric is pretty good at hiding the staples because it is sort of quilted, but you could hide the staples underneath.
I then pulled the fabric down around the front legs in a nice pleat and poked two smallish holes through to make way for my cute coordinating ribbon. I took my ribbon and wrapped in around each leg then weaved through the holes and tied it in a pretty little bow. I secured the ribbon on the back of the leg with a staple.
Now for those of you who are concerned about my reckless holes I poked in the fabric, the original instructions said to use grommets. I was just a little too impatient to wait and get them so I did what I had to do. ;) It works wonderfully!
I usually like to paint anything I can, but for some reason I liked this as is. Not to say that there won't be a day it becomes victim to a brush or spray paint can. But for now it stands. Sorry the pics are dark and that I don't have step by step pictures, but I hope you get the general idea.
Sharing over at The Shabby Chic Cottage for Transformation Thursday!
And...