Showing posts with label home decor. Show all posts

Saturday, September 10, 2011

If Your Belt Breaks, Make Something Out of It

IMG_0250

My very favorite thrift store belt broke.  I was sad.  I love the warm worn leather…the metal details…the rustic quality…the story it may tell.   I thought of ways to fix it and then it hit me…use it in a different way.

IMG_0251IMG_0146IMG_0252

I’ve had these little mirrors from Hobby Lobby that were $2 each.  I thought the elegant detail of the mirrors was a great contrast to the rustic belt.  I used Gorilla Glue epoxy to attach them securely to belt.  I add a piece on the bottom as well to finish off the look.  I let it dry for a few hours just to make sure.  Using my hand weights…I knew they were good for something;)

IMG_0246

To make the hanger I simply looped some ribbon through the belt where the buckle would go.  Again another contrast to the worn leather for a unique look.

IMG_0244

What do you think?  It is now one of my favorite pieces in my home and a reminder to think outside the box!

rustikchic

Here is a sneak peak of another idea that spurred from my broken belt…Stay tuned for an exciting announcement!

Linking UP!

Funky Junk's Sat Nite Special
UndertheTableandDreaming


Wednesday, June 22, 2011

Put Some Meaning in Your Decor

IMG_2033 
Using numbers in home decor is nothing new, but if you use numbers with special meaning it can add such a personal touch to your home along with being an interesting conversation piece.
I had been wanting to incorporate the number 96 into our family room for a while, so when I saw Leen the Graphics Queen was doing a fundraiser with her number decals, I thought it was a great time to order my numbers.  She was raising money for the tornado victims and ended up raising $500!  (You can read about it {HERE}.) Thanks Leen for wonderful decals, excellent customer service and for lending help to those in need.:)
IMG_2025
I have had these wood candle chargers for years and they were just collecting dust.  I lightly painted them with the  Glidden paint sample I used on my little mirror.  Next, I simply attached my number decals.  I then took some tape and pressed in on the paint in a few areas to give a more worn look.
IMG_2034
Easy as that!
I love projects like this…super easy, a meaningful display and definitely one of a kind.
They don’t have a permanent home as of yet, but I really am pleased with how they turned out and I know they will add character & interest to our family room. *BTW, for some reason in the pictures the 9 looks duller than the 6, but it really isn’t*
Oh, & why 96 you ask?  It’s the year Mr. Husband & I met…aww, presh, I know;)
Here are a couple more projects where I subtly added some meaningful numbers…

The 36th Avenue

Monday, June 6, 2011

Quick Change Mirror


IMG_1985
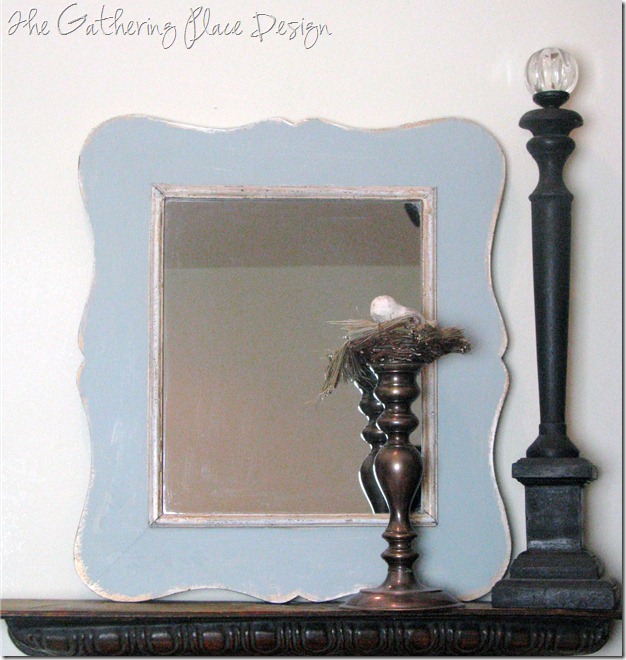
I’ve had this little mirror for years, but as of late she’s just been chillin’ in storage.
I love the shape of it and the details on the edges, but I was over the flowers and wanted some color added to our family room.  I very casually painted the frame leaving the edges alone for a layered & aged look.
~I  used a little sample bottle of Glidden paint called Slate Green. I love using these samples for small projects like this.  Since I wanted a ‘not-so-perfect’ look for this mirror I evened used the little brush included to paint. ~
  IMG_1771     IMG_1981
Literally took me under 5 minutes…what do you think?

Tuesday, May 31, 2011

Adding Some Character

IMG_1797
Have you ever dissected a piece of furniture or home decor that you love to see what it is exactly that you love about it?
For me it is usually in the little unique details.
IMG_1832
  Enter these woven baskets with lids. 
I bought these on super clearance for like $15 for all three. They are fine as is….  Nice basic baskets, but nothing to write home about. 
IMG_1827
But by simply adding a little detail, they suddenly look interesting and unique.  I just tied on some old  metal pieces I already had with twine and a few minutes later…some instant character to my boring baskets.
IMG_1830  IMG_1828IMG_1831
I really love them now.
Look around and notice what you like and why.  Then see how you can turn what you already have into something you love!

Photobucket 

Wednesday, March 23, 2011

Adding a Personal Touch with Photos

IMG_1338 

Using great family photos in your decor is a great way to add interest and character and really personalize your space.

I have always LOVED photos.  Taking pictures, displaying pictures, even being in pictures…sometimes.;) Growing up I my room was plastered with photos of friends and family and every where I went I took pictures.  In all the homes we have lived in I always had a lot of photos of family & friends displayed.  For whatever reason in our current home I don’t have as many out.

Anyway, I am working on tweaking our family room. 

I  found this great fabric {for a steal!} to make my curtains out of. 

pp-waverly-fabric-divine-damask-tobacco-671220 

I will be sharing the updates, but I am basically cutting out a lot of the reds and adding in more warmth and personality, like with some Family Photos.

Here is the before…

IMG_1767-1

And the after…

IMG_1343-1

I used the big mirror as a ledge to lean my pictures on.  Get creative.  You don’t have to just hang everything on the walls.  Layering these frames like this, again adds interest and dimension to this wall.  These are some of my favorite pictures and displaying them like this was an instant warm up for this room…and my heart. :)

  Once I get the curtains up I will start on pillow, throws, etc. 

Did you notice the new lamp shade?  Much better. 

I am also deciding what color to paint the little end table…any suggestions? :)

Monday, March 14, 2011

Whimsical Spring Wreath Tutorial

I am dreaming of Spring
so ready for brighter scenery and warmer weather. 
{seasonal depression anyone?! ;)}
Well, if Mother Nature isn’t bringing it yet, at least we can bring it with our decor. 
Here is a simple, fun and whimsical Spring wreath tutorial for ya.  To brighten your day, & if I’m not alone in this…brighten your mood. :)
2011-03-14 0021
 Materials
  • wispy grapevine wreath
  • moss flower or other spring like accent
  • silk poppies
  • boxwood greens
  • spring blossom stems
  • jute ribbon
  • hot glue
  • wire
  • moss
IMG_1196
Start by hanging your wreath with your jute ribbon. You could do this at the end as well, but this way you won’t have to mess with your completed wreath.
IMG_1188 IMG_1189 IMG_1190
Position your moss flower (mine is from Michaels) or other decorative piece where you would like,then secure with floral wire. 
IMG_1191 IMG_1192 
Next, add in your flowers with a bit of hot glue and wire if needed.  Arrange them somewhat evenly without getting too much of a uniform look.  You want them to look as if they are growing right out of the wreath. Cover up any stems with moss pieces…this adds more texture to the design while covering up glue drips, etc.
IMG_1193 IMG_1195 IMG_1194
Now fill it in with your greens. Working around the center of the wreath in the direction of the grapevine.  Then add in your longer blossoms and stems for a wispy three dimensional look.  Keep adding until you reach your desired look.  It’s your wreath, there is no right or wrong. :)
IMG_1247   
I hope this gets your creative juices flowing and gives you some inspiration and ideas for your Spring decor.  :)
IMG_1243-1

Getting linky with it…

this blessed nest
Visit thecsiproject.com
Tip Junkie handmade projects 
 

Wednesday, March 9, 2011

A Touch of {Green}

IMG_1184

Here we go again…I’ve changed up my little cabinet for the new season. ;) 

I’m bringing on the GREEN

One reason being that it is March/St.Patrick’s Day and another being that I am so wishing for green outside!!  I also wanted to keep it more simple and clean because I am feeling the need for a clean slate this time of year.

IMG_1187IMG_1185  IMG_1183 IMG_1182 IMG_1179

I brought out my garage sale shutters and stacked them up for some height and depth.  I left the little wood box because it give some height plus we hide keys & stuff in the cubby on the back.  Works nicely by the door.  {Genius, I know.}  

The only other things I added is my tin pitcher with some pussy willow branches and some Bells of Ireland (seemingly festive although they are not even native to Ireland), and a little ball of greens on a mossy birds nest.

I kept one of the little love birds from my Valentine Vignette nested on top of one of the thrift store candle sticks.  Sadly, the other little love bird had a tragic death.  Mr. Husband accidently knocked it off while putting on his coat one day.  I told him I hoped it wasn’t a sign that our love was dying….He said it was a sign. A sign that I shouldn’t place breakable items near the coat rack.  ba-dum ching ;)

IMG_1176

What do ya think?  Spring-y, clean and GREEN? 

Oh good, because that’s what I was going for. :)

Getting all Linky…

this blessed nest