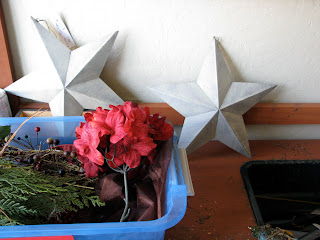
I love to make these cute decorative stars. They make a great accent piece with any decor throughout the season. Here is a quick and easy Christmas Star!

Alright. Confessions time. I don't like to throw anything away because "I might need it one day". ;) Seriously, my mother-in-law calls me everytime Oprah has that show about hoarders. LOL! I admit sometimes you need to throw things away but here is an example of what you can do with all that "crap". ( as my husband so kindly calls it ) Above you will see a nice little bin (me being organized!) where I keep some of my Christmas leftovers. I grabbed that and a star I already had...I'm sure I found on clearance somewhere! Ohhh Yeeaahh!!

Lets dig in. I found a sprig of twigs already bunched together. I attached this to the star with wire and hot glue and... some more hot glue. Now I have an anchor of sorts. Check out this perfectly wonderful pine I found!!

I stuck 3 sprigs of the pine under the wire with some more hot glue. Because it is flat, this pine makes a great backdrop. Next I found a couple little pine cone fellas. I tightly wrapped the stem with my green pipe cleaner and wound it back down to make it a little sturdier. (word?)

I wedged it down in the wire among the twigs and pine, with some hot glue. ( I love me some hot glue!) Then, a favorite trick of mine, covered my tracks with moss. Have I told you I love moss? I do. Look how it hides everything and looks great!

Now for a pop of color an orphan hydrangea bunch. I snipped of individual stems. This way they are light and easy to tuck in there with yet some more hot glue.

Time for the other pine cone friend. I used the other half of the green pipe cleaner to attach him in.

Cover with some more moss...

Add in some leftover berries for some more color.

Then I found a remnant of gorgeous brown tulle that I wrapped around the star, over the wire from the beginning, and tied it in a knot. A bit of hot glue will hold it in place. Trim up the ends and look for any place you might need some more moss.

I decided it needed some cinnamon sticks I found. Wrapped these together with pipe cleaner. To add a little more color and sweetness, I tied a bow around these before I stuck them in.

Ta da! Pretty cute eh?

This fun project took me about 15-20 minutes. For real! There is no wrong or right and don't judge it until your finished. Have fun with it and give it your own flair! :)

You can tuck this little star anyway in your Christmas decor. On a shelf, under the tree, in the tree or even on top of your tree!

Here is another one. Again made from just leftovers! :) What do ya think of this "crap" now, honey? Bwahhahahaha ;)

I will definately be posting more ideas on using leftover items, so hang on to some of those scraps! You never know!
I linked up to WFMW at WeAreThatFamily.com
I'm entered in the See Mommy Sew Tutorial Contest!


I have a large wood star I almost threw in the trash today...now I know what to do with it! Thanks for the idea.
ReplyDelete@Cheap Chic Home. I absolutely love this idea. I put stars on my front doors because they are easier to see--I may have to do some embellishing. Thanks for sharing.
ReplyDeleteThis is so cute. You definitely have the knack for decorating. I have a feeling mine might not turn out so cute . . . :o Don't you love making something from nothing? I've been having fun with fabric scraps and quilting.
ReplyDeleteI love this post! Thanks so much for showing step by step how you did it (so I can try to copy lol) Both your stars turned out so pretty.
ReplyDeleteThis is so creative. I'm now going to look at all my discarded items to see what I can spruce up!
ReplyDelete